OpenClaw, an emerging AI agent platform, has recently gained significant attention across developer communities and tech media. Many users want to try it, but the installation process can be confusing for beginners.
After installing OpenClaw by myself, I have concluded 2 methods to install it. In this guide, we’ll walk through two practical ways to install OpenClaw safely and efficiently. Whether you prefer running it locally or deploying it on a cloud server, this tutorial will help you get started quickly.
TL;DR: Two Ways to Install OpenClaw
How to Install OpenClaw?
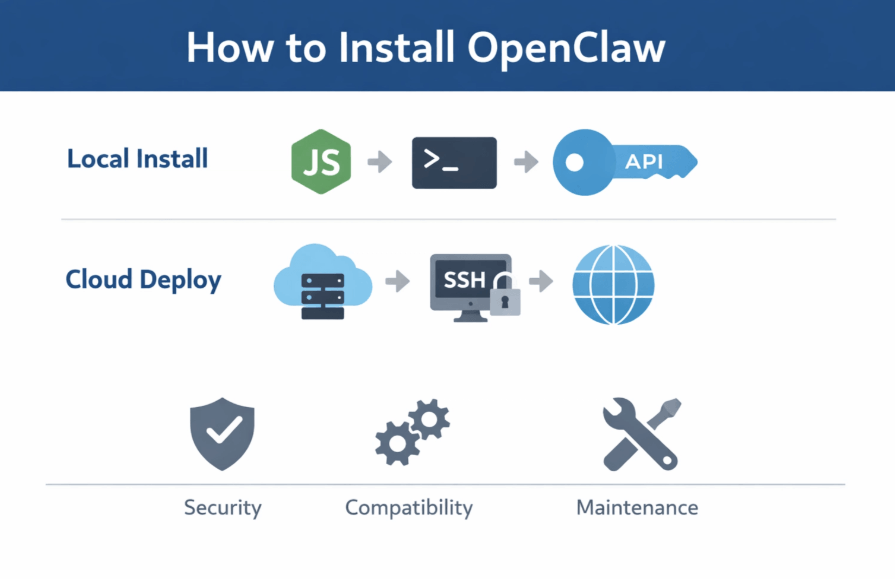
Option A: Install OpenClaw on Your Local Machine
Running OpenClaw locally gives you full control over the system environment and configuration. This method is commonly used by developers who want to experiment with the framework or customize their setup.
Step 1: Prepare Your Machine
Before installing OpenClaw, make sure your system environment is ready. A stable environment ensures that the AI agent runs smoothly without unexpected crashes.
Operating System: Ensure you are using a modern version of Mac, Windows, or Linux.
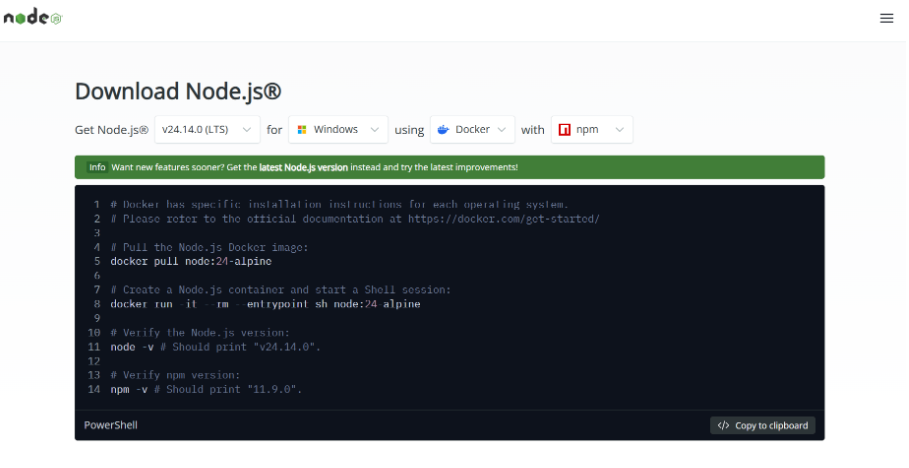
Node.js Runtime: You must have Node.js version 22 or newer installed on your system.
Git Version Control: Install Git to manage the source code and updates from official repositories.
Hardware Resources: A minimum of 4GB RAM is recommended to handle the agent's background processes.
Tips:
- Hardware Check: Ensure your system meets the recommended hardware requirements to avoid performance bottlenecks.
- Data Backup: Back up important files before installation to prevent accidental data loss during environment setup.
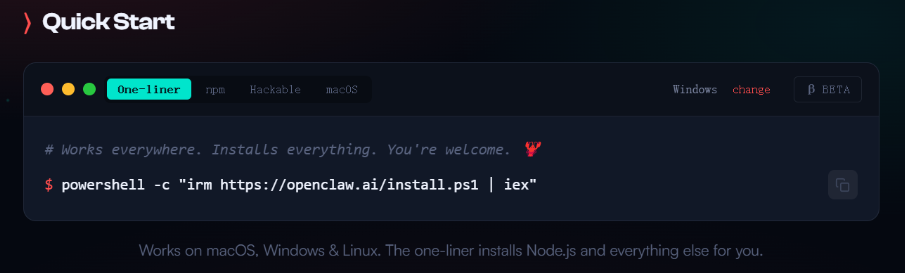
Step 2: Download and Install OpenClaw
Next, install OpenClaw using the official installation instructions. Following the official path is the only way to ensure you are getting the latest features and security patches.
Steps:
Visit Repository: Go to the official OpenClaw GitHub repository or website to find the latest release.
Copy Command: Locate and copy the npm or pnpm installation command suitable for your environment.
Open Terminal: Launch your terminal or command prompt with administrative privileges.
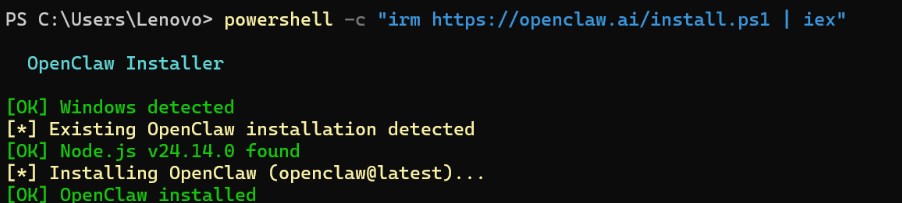
Important Tip: Always download OpenClaw from the official source to avoid security risks from counterfeit repositories. Verified sources guarantee the integrity of the code you are running on your machine.
Step 3: Complete the Initial Setup
After installation, configure your OpenClaw environment. This step is crucial for connecting the agent to the "brain" it needs to function.
LLM Connection: Connect your LLM API provider, such as OpenAI or Claude, by entering your API keys.
Skill Selection: Select specific agent skills or capabilities from the library to tailor the agent to your needs.
Tool Integration: Integrate external tools or services like Slack or WhatsApp to enable the agent to interact with other platforms.
Once configuration is complete, your OpenClaw instance should be ready to run by executing the openclaw onboard command.
Option B: Install OpenClaw on a Cloud Server
Installing OpenClaw on a cloud server can be a better choice for users who want to avoid running AI agents directly on their personal machines. Some users prefer this method because it reduces potential risks to their local system security and data while still allowing remote access to the AI agent environment.
Step 1: Choose a Cloud Provider
Start by selecting a cloud platform that supports your deployment requirements. The right provider will offer the balance of performance and cost that fits your project.
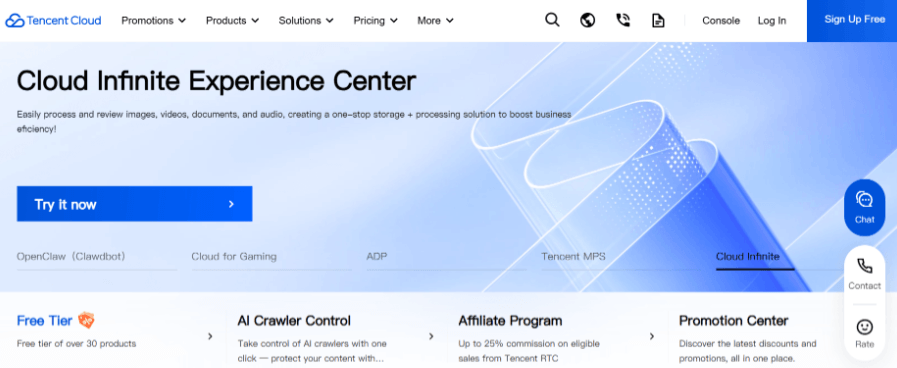
Major Providers: Consider industry leaders like Tencent Cloud, Google Cloud, or Azure for robust infrastructure.
AI Infrastructure: Look for platforms specialized in AI workloads that may offer pre-configured environments.
Specialized Services: Use specialized deployment services if you prefer a more managed, "hands-off" experience.
When choosing a provider, consider:
- Data Isolation: Ensure the provider offers strong security and data isolation features.
- Performance: Check if the server performance meets the high-compute needs of AI agents.
- Complexity: Evaluate the deployment complexity to ensure it matches your technical skill level.
- Pricing: Compare pricing models to avoid unexpected costs as your usage scales.
Step 2: Deploy OpenClaw on the Server
Once your server is ready, you can proceed with the deployment. This process involves setting up the environment remotely to host the OpenClaw daemon.
SSH Connection: Connect to your cloud server securely via SSH from your local terminal.
Install Dependencies: Install the necessary runtime dependencies, specifically Node.js (v22+) and Git.
Clone Repository: Use Git to clone the OpenClaw repository directly onto your server's storage.
Run Installation: Execute the installation commands, typically npm install followed by the onboarding script.
Many cloud platforms also provide automated deployment scripts or Docker images that simplify this process significantly.
Step 3: Complete the Initial Configuration
As with local installation, you must configure the core settings of your cloud-based agent. Proper configuration ensures the agent can communicate with external APIs securely.
API Credentials: Securely input your API keys into the server's environment variables.
Agent Capabilities: Define the specific tasks and capabilities the cloud agent should prioritize.
Remote Access: Set up tool integrations and ensure the gateway port is open for remote communication.
Once setup is complete, your OpenClaw agent can run on the cloud server and be accessed remotely from any device.
What to Pay Attention to When Installing OpenClaw
1.Security Risks
Because OpenClaw may require API access and system permissions, security should be a priority. Treating your API keys as sensitive passwords is the first step in protecting your account.
- Official Sources: Download only from official sources to prevent malware or data-leaking "forks."
- Credential Protection: Protect API keys and credentials by using environment variables instead of hardcoding them.
- Access Control: Limit server access permissions to the minimum required for the agent to function.
2.Environment Compatibility
Installation issues often occur due to incompatible environments. Verifying your system specs before you start can save hours of troubleshooting later.
- Node.js Version: Check that your Node.js version meets the minimum requirement of version 22.
- Dependency Check: Ensure all required system-level dependencies are installed and up to date.
- Permission Settings: Verify that system permissions allow for global package installation and background service execution.
3.Maintenance and Updates
AI agent frameworks evolve quickly. Staying updated ensures you have access to the latest AI models and security improvements.
- Official Monitoring: Monitor official updates and release notes on GitHub regularly.
- Dependency Updates: Regularly update dependencies to fix bugs and improve performance.
- Staging Tests: Test new versions in a separate environment before deploying them in a production setting.
Conclusion
Installing OpenClaw can initially seem complex, especially for users unfamiliar with development environments. However, by choosing the right installation method and following the correct setup steps, the process becomes much more manageable. Whether you install OpenClaw locally for experimentation or deploy it on a cloud server for better isolation and security, proper preparation and configuration will help you run your AI agent environment smoothly.
Your AI Receptionist, Live in Minutes.
Scale your front desk with an AI that never sleeps. Solvea handles unlimited multi-channel inquiries, books appointments into your calendar automatically, and ensures zero missed opportunities around the clock.
FAQ
1.Is OpenClaw difficult to install?
For users with basic development experience, installation is manageable. Beginners may need some time to set up the required environment and dependencies.
2.Can beginners install OpenClaw?
Yes, but some familiarity with command-line tools and development environments is helpful. Following a step-by-step guide like this one makes the process accessible to most.
3.Should I install OpenClaw locally or on a cloud server?
Local installation is often used for development and testing, while cloud deployment can help reduce potential risks to local systems and allow remote access.
4.What are the most common OpenClaw installation problems?
Typical issues include incompatible Node.js versions, dependency errors, permission problems, and incorrect API configurations. Most of these can be fixed by following the troubleshooting steps provided above.