> ## Documentation Index
> Fetch the complete documentation index at: https://solvea.cx/docs/llms.txt
> Use this file to discover all available pages before exploring further.
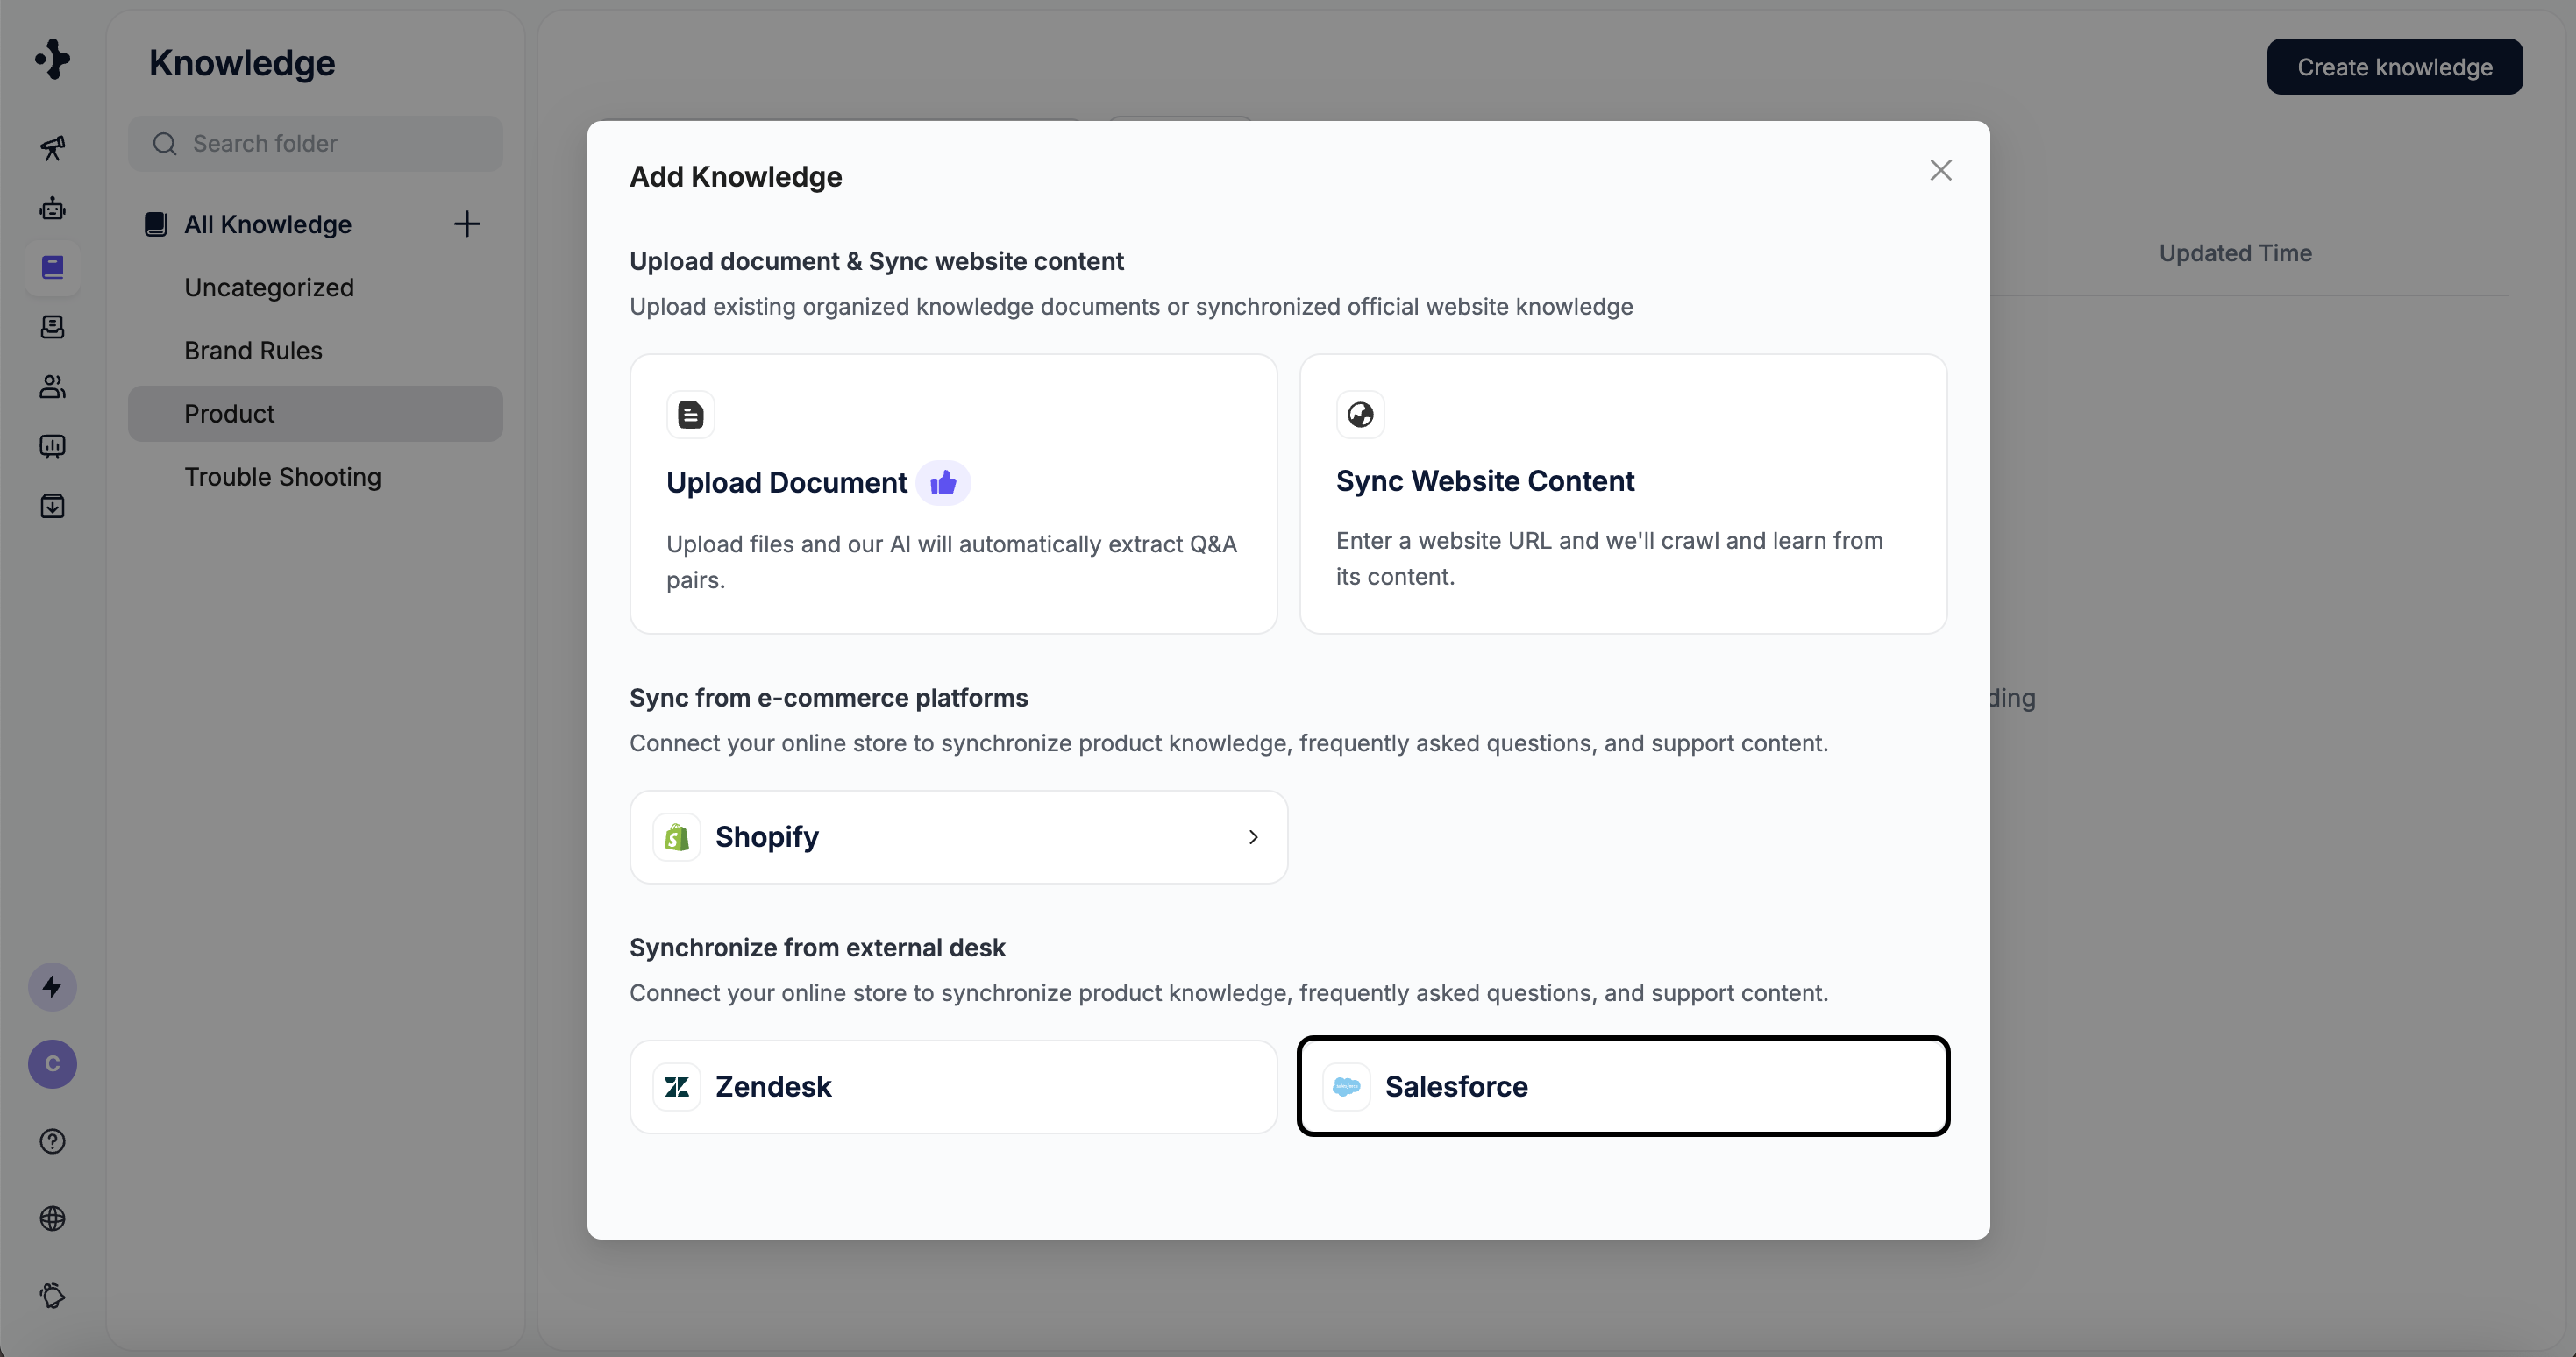
# Sync from Platforms
> Sync knowledge directly from integrated platforms to keep your content up to date.
## Shopify
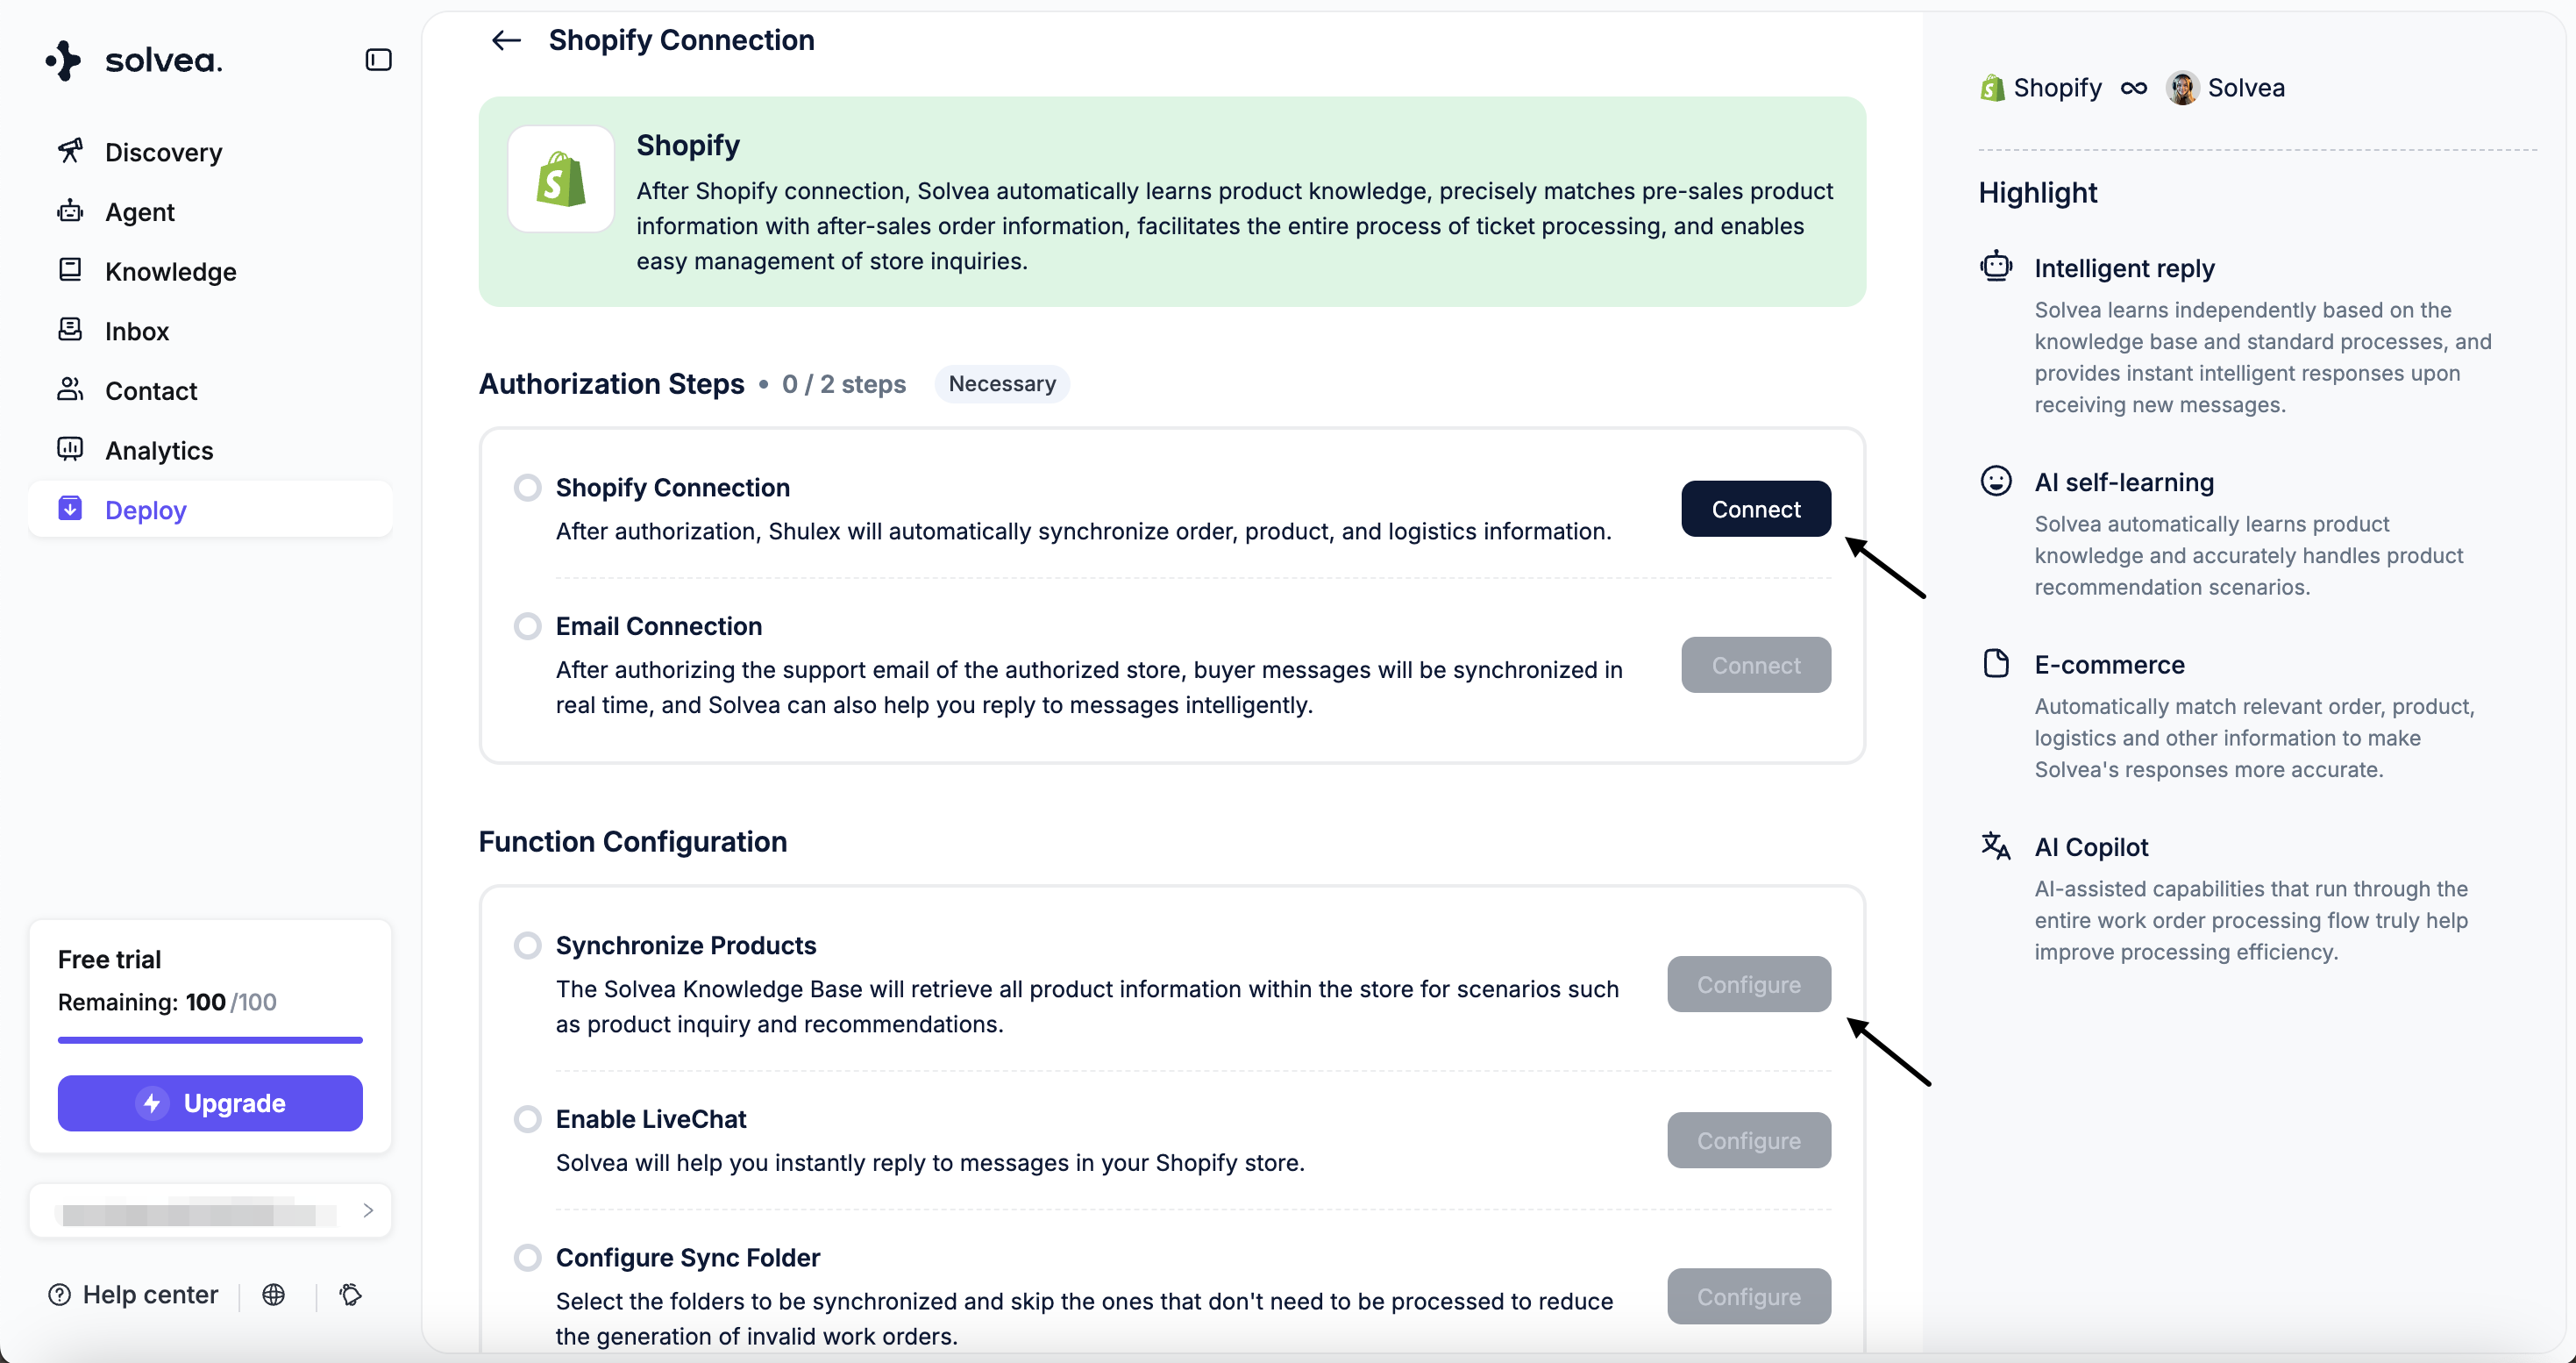
After authorizing your Shopify store, you can sync product-related knowledge into a specified folder.
Product knowledge synced from **Shopify** will be **automatically updated daily**.
### Steps
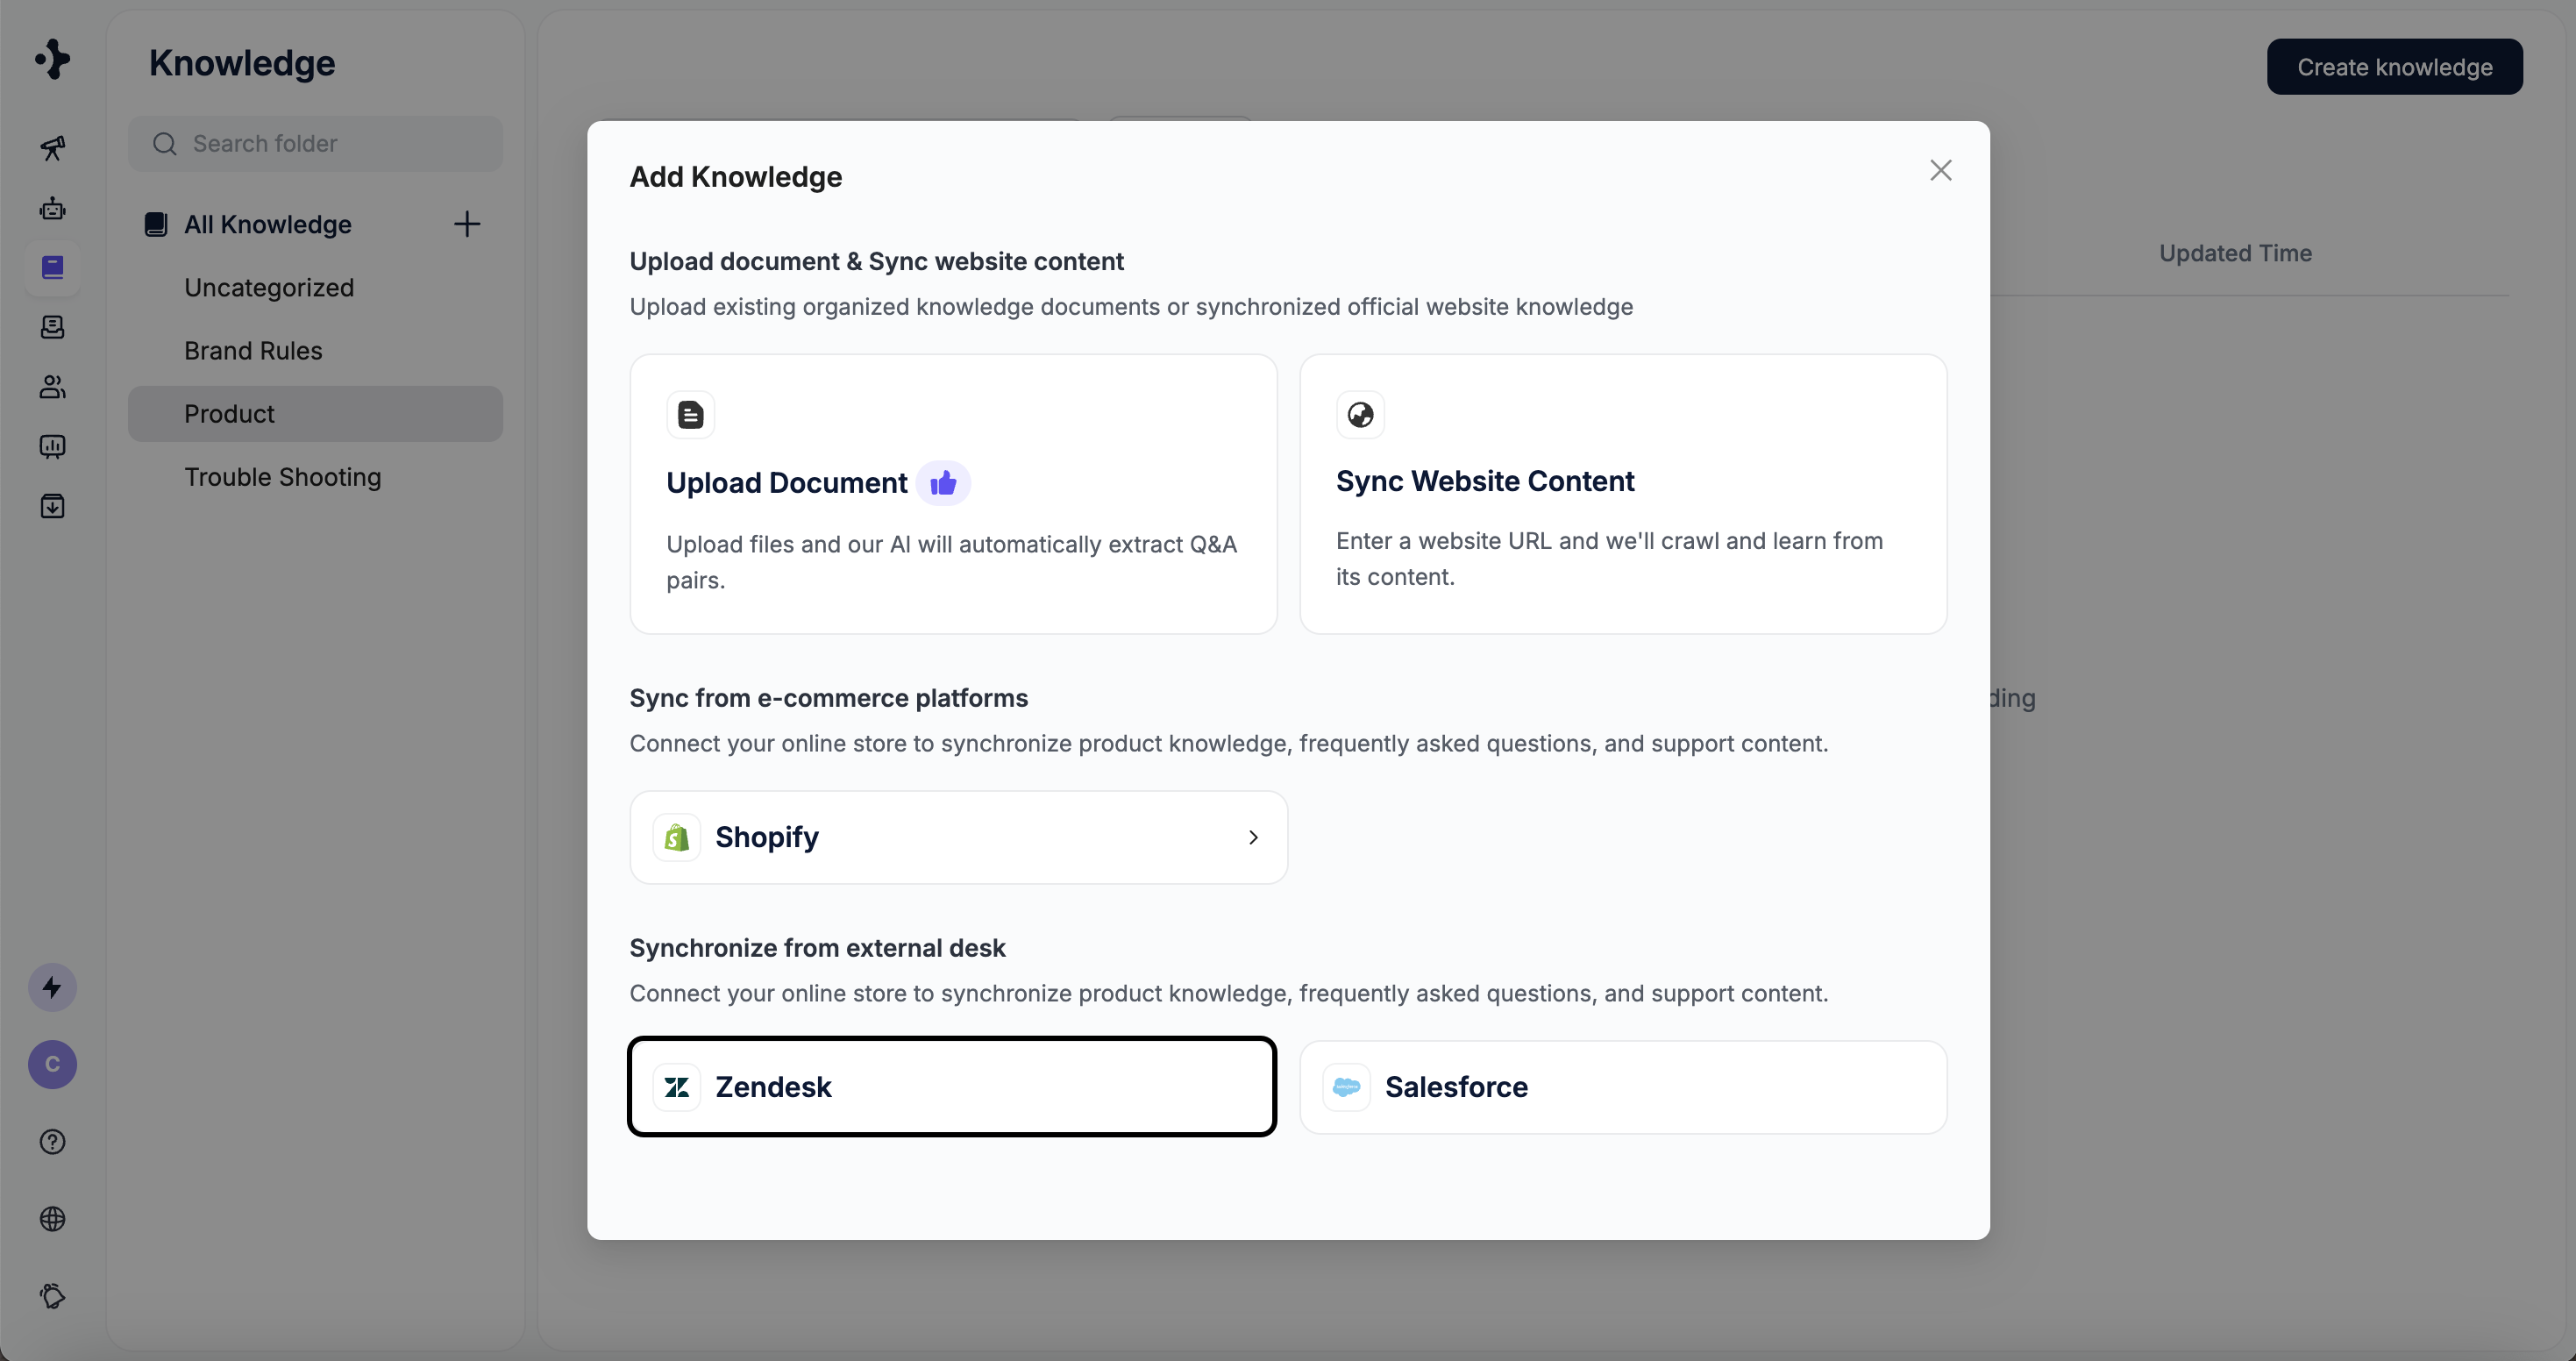
Select the folder where the knowledge should be stored.\
Click **Add Knowledge** → **Shopify**
 You will be redirected to the **Deploy** module to complete the setup.
For detailed instructions, refer to the [Shopify integration guide](/deploy/e-commerce-platform/shopify).
You will be redirected to the **Deploy** module to complete the setup.
For detailed instructions, refer to the [Shopify integration guide](/deploy/e-commerce-platform/shopify).
 ## Zendesk
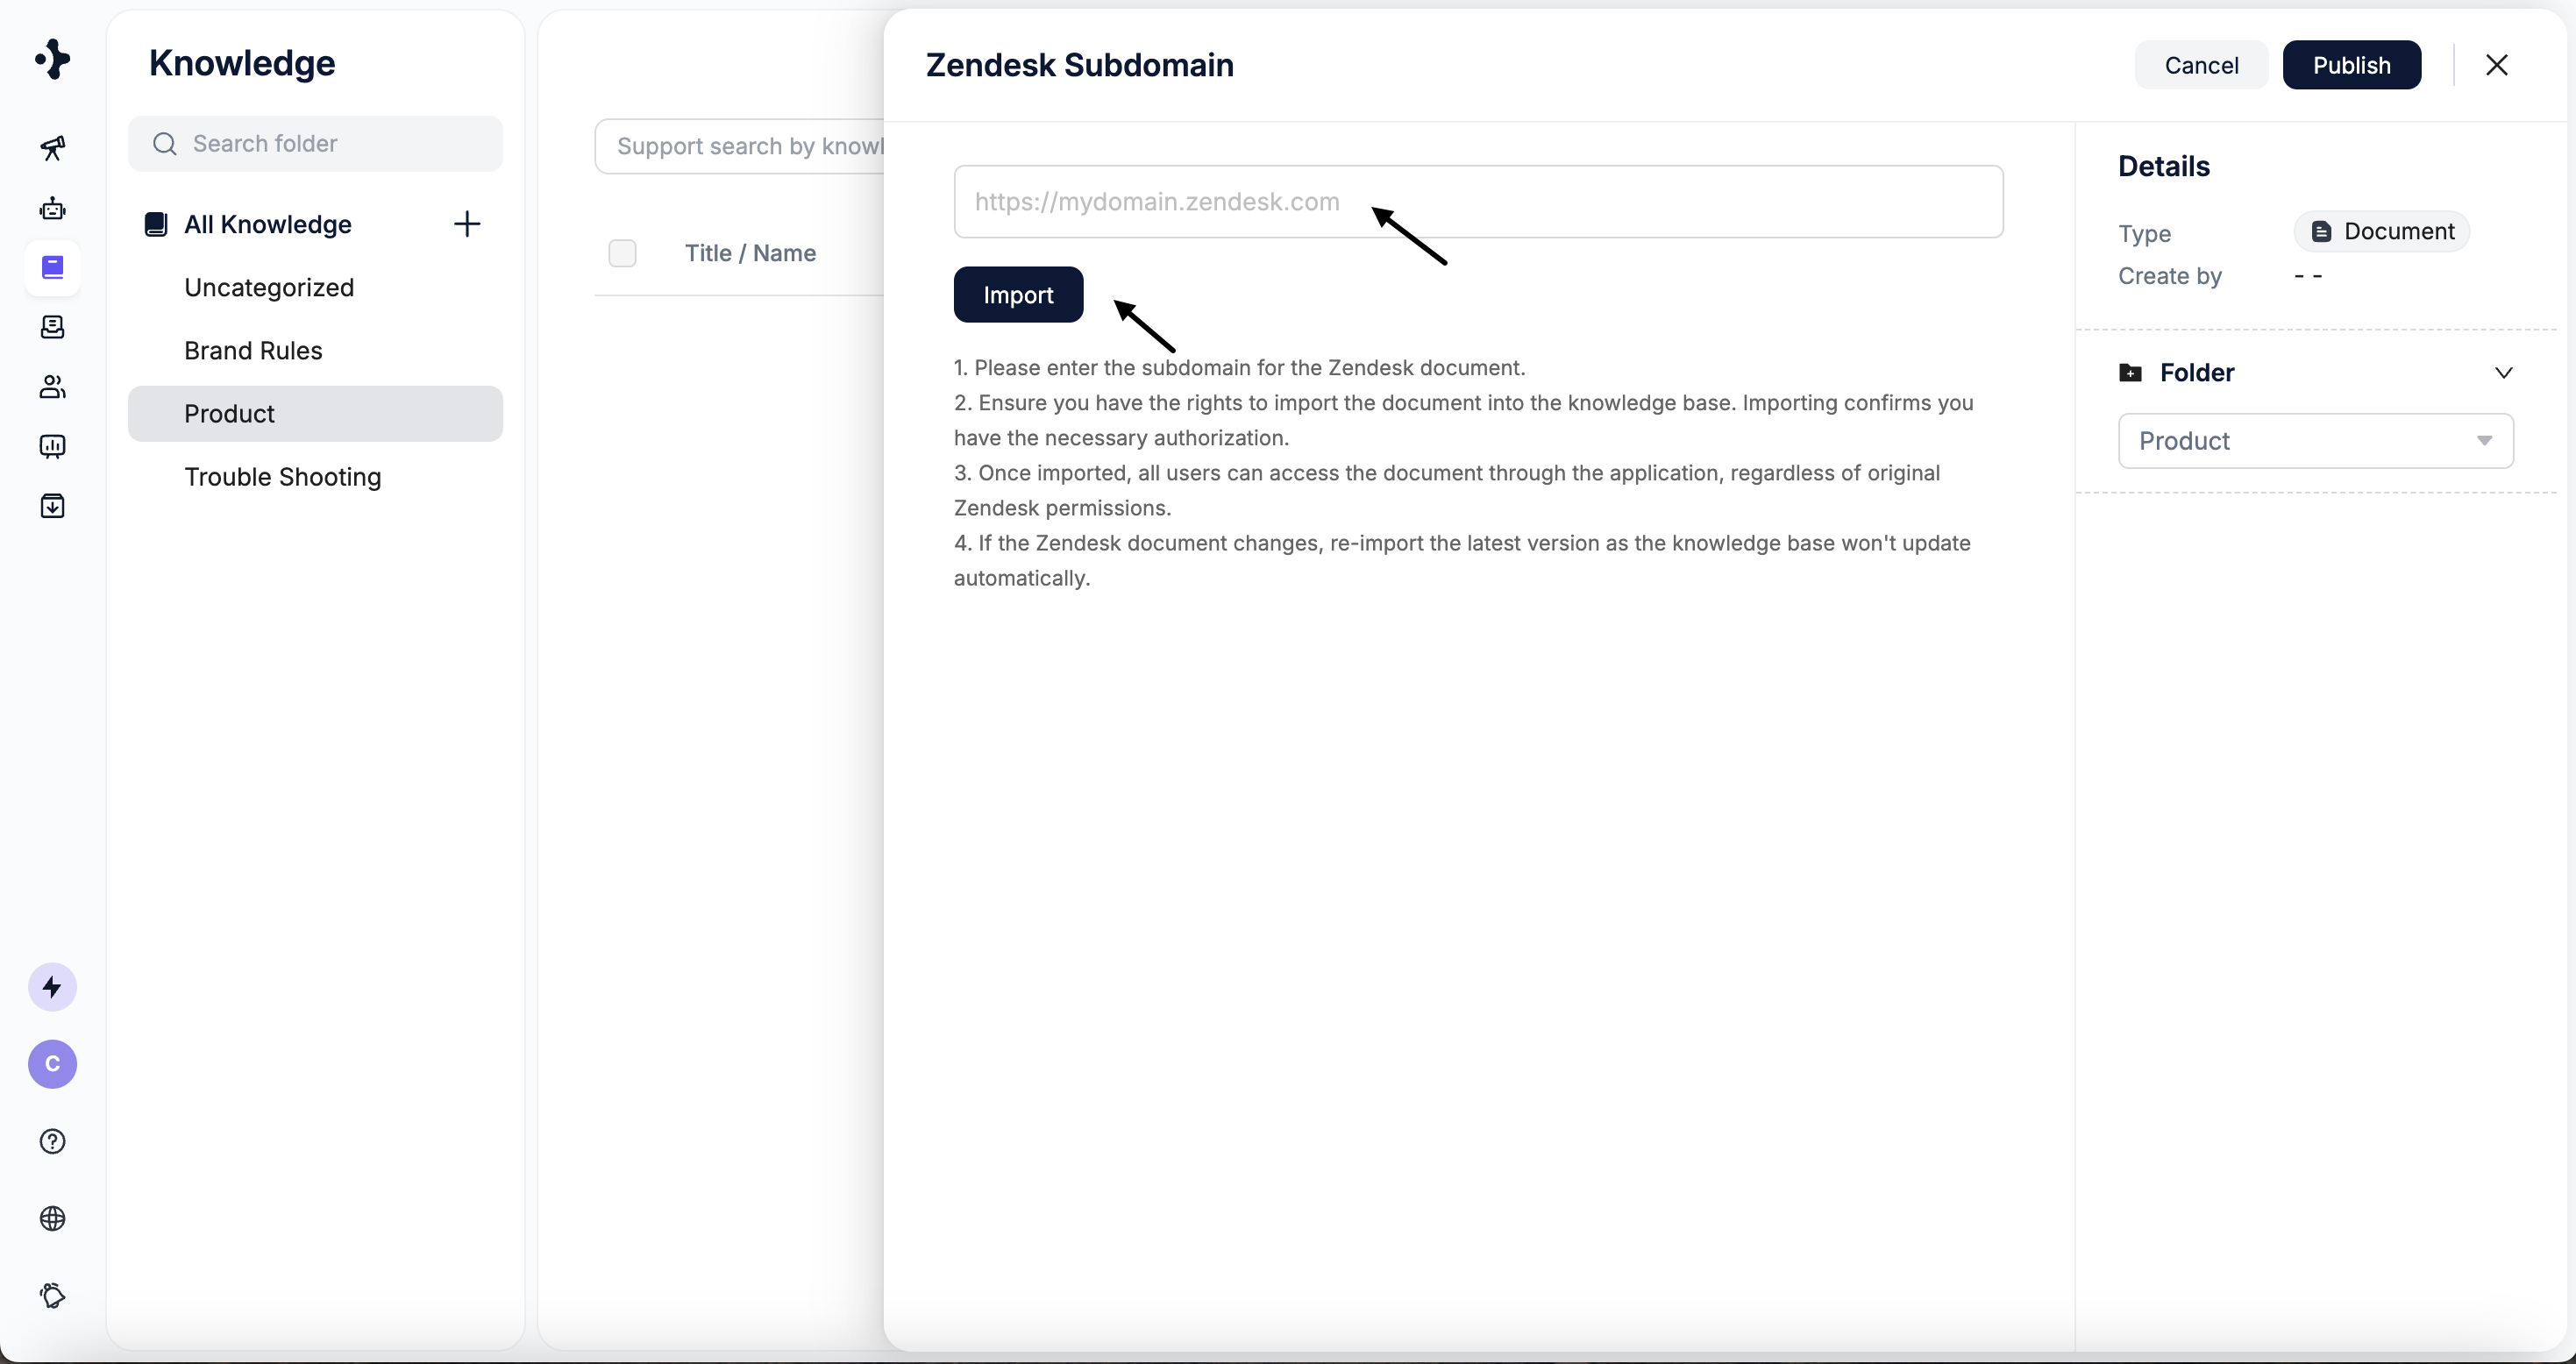
Sync articles from your Zendesk Help Center into the knowledge base.
Knowledge synced from **Zendesk** will **not be auto-synced daily**. If there are updates, you will need to re-sync manually.
### Steps
Select the folder where the knowledge should be stored.\
Click **Add Knowledge** → **Zendesk**
## Zendesk
Sync articles from your Zendesk Help Center into the knowledge base.
Knowledge synced from **Zendesk** will **not be auto-synced daily**. If there are updates, you will need to re-sync manually.
### Steps
Select the folder where the knowledge should be stored.\
Click **Add Knowledge** → **Zendesk**
 Enter your Zendesk domain.
Click **Import** to start importing content.
Enter your Zendesk domain.
Click **Import** to start importing content.
 ## Salesforce
Import knowledge articles from Salesforce.
### Steps
Select the folder where the knowledge should be stored.\
Click **Add Knowledge** → **Salesforce**
## Salesforce
Import knowledge articles from Salesforce.
### Steps
Select the folder where the knowledge should be stored.\
Click **Add Knowledge** → **Salesforce**
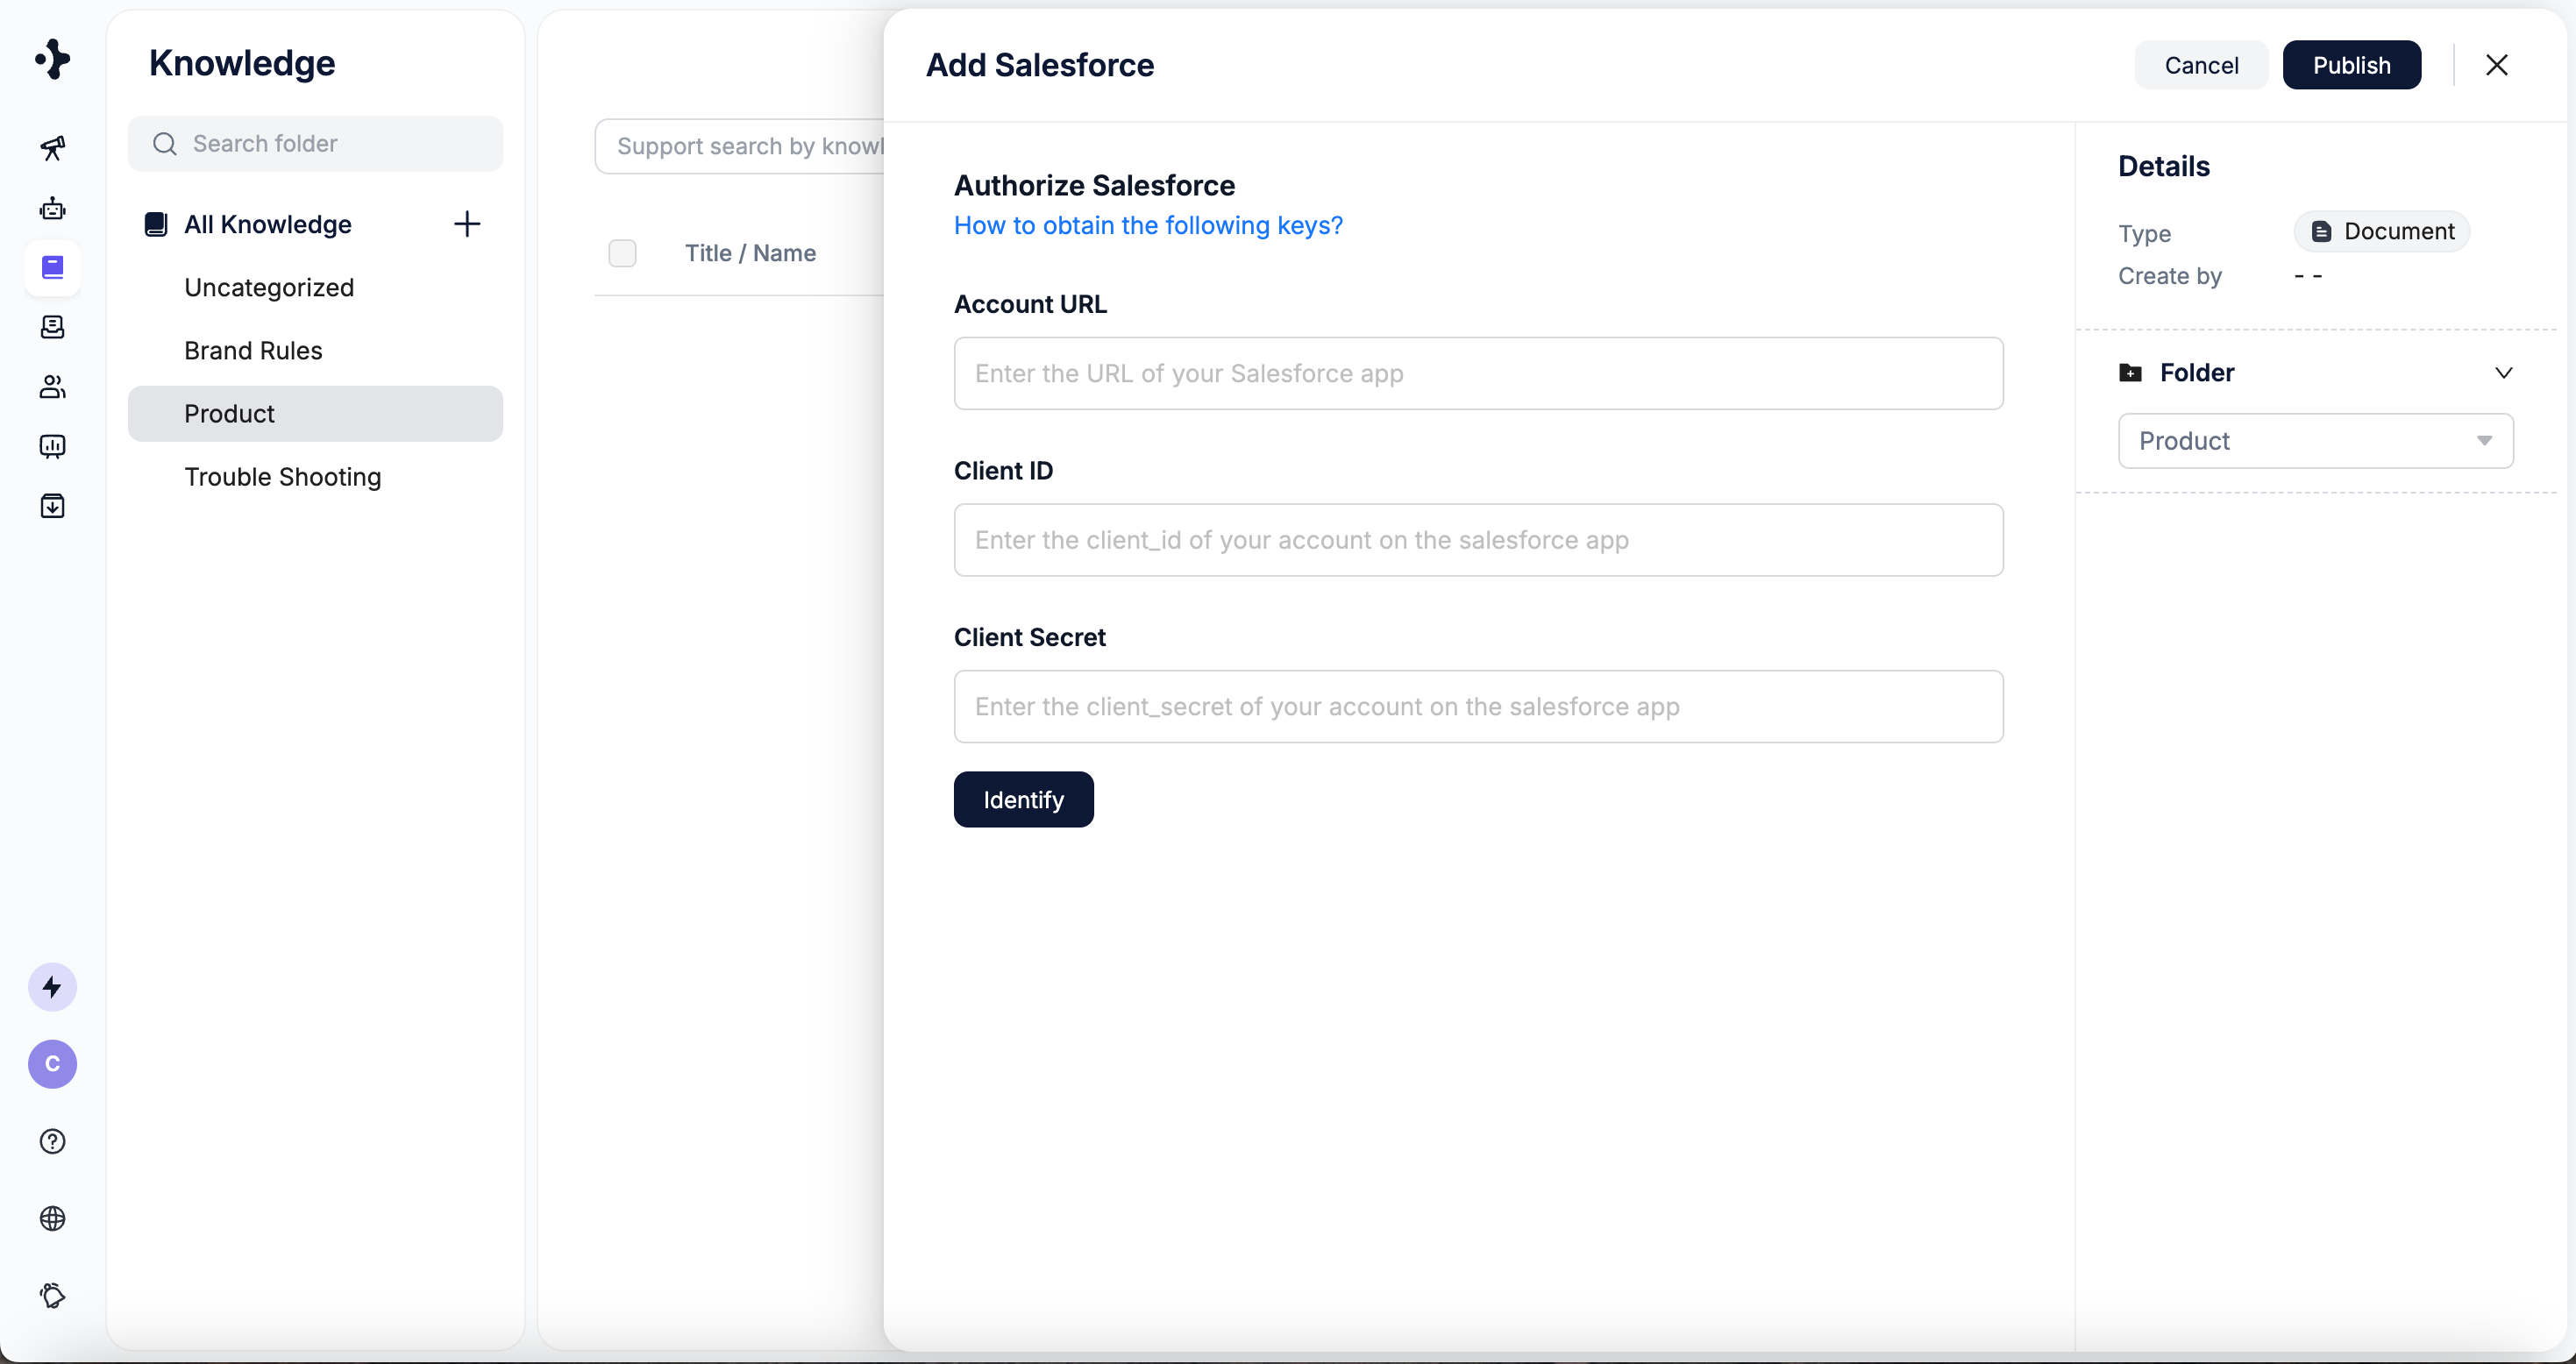
 Enter your Account URL, Client ID and Client Secret.
To obtain your Client ID and Client Secret, please refer to the official Salesforce documentation: [Generate an API Client ID](https://help.salesforce.com/s/articleView?id=cc.b2c_generate_api_client_id.htm\&type=5).
Click **Identify** to start syncing.
Enter your Account URL, Client ID and Client Secret.
To obtain your Client ID and Client Secret, please refer to the official Salesforce documentation: [Generate an API Client ID](https://help.salesforce.com/s/articleView?id=cc.b2c_generate_api_client_id.htm\&type=5).
Click **Identify** to start syncing.